

Step-by-step: How to post a job on JobsVerifier
Hiring in 2025 is nothing like hiring a decade ago. Today, top candidates don’t just look for job descriptions — they look for trust, authenticity, and proof that the employer is real. That’s exactly why more companies are turning to JobsVerifier, a platform designed to help employers build credibility while attracting better applicants.
If you’re an employer wondering how to use JobsVerifier to post your job the right way, you’re in the perfect place.
Here’s a complete, step-by-step walkthrough to make your job posting professional, verified, and highly visible.
Let’s dive in!
🎯 Why Post Your Job on JobsVerifier?
Before we get into the steps, here’s why thousands of employers prefer JobsVerifier:
- You gain a “Verified Employer” badge, boosting candidate trust.
- Your job post becomes more visible to serious applicants.
- Candidates feel safer applying — meaning more genuine submissions.
- The platform screens out fake employers, helping real companies stand out.
- Posting is simple, fast, and optimized for modern hiring.
✅ Step-by-Step Guide to Posting a Job on JobsVerifier
Let’s walk through the entire process — from creating your account to publishing a fully verified job listing.
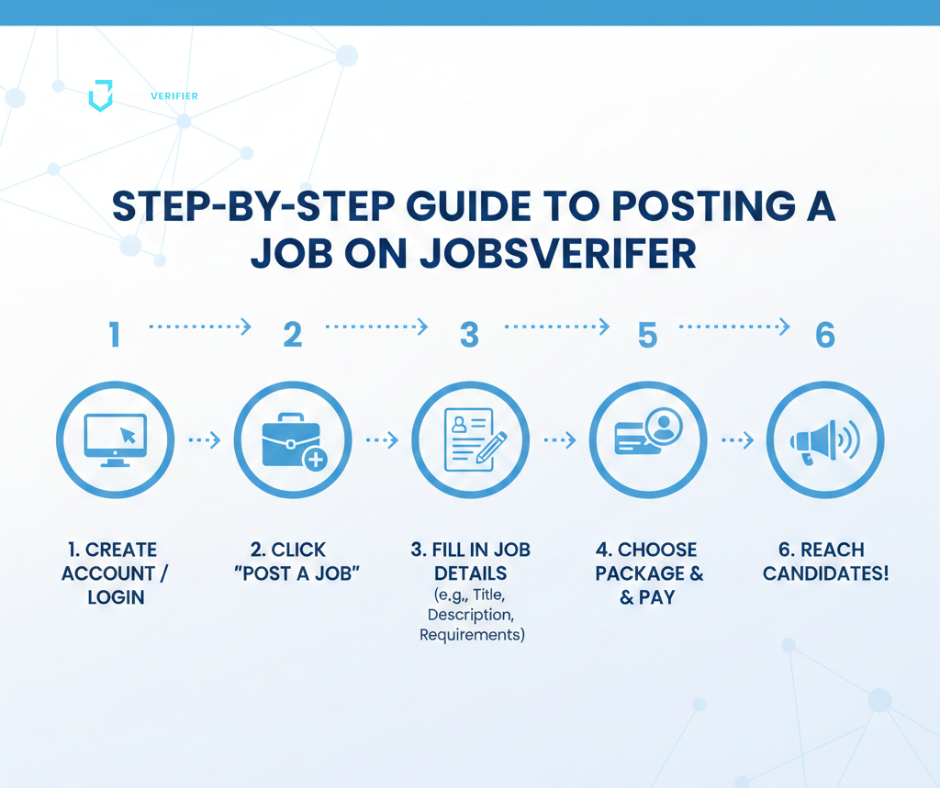
Step 1: Create Your Employer Account
The process begins with setting up your employer profile.
🔧 What you need:
- Official company email
- Company name
- Website URL
- Basic information about your business
📝 How to do it:
- Go to JobsVerifier.com.
- Click on “Employer Sign Up”.
- Enter your company details.
- Verify your email.
Once your email is verified, you’ll enter your new employer dashboard — your control center!
Step 2: Complete Your Company Profile
To earn trust from candidates and increase your chances of getting the Verified Badge, complete your profile fully.
💼 Add:
- Company logo
- Industry type
- About section (short description)
- Office location(s)
- Social media links
- Company website
🌟 Why this matters:
Candidates prefer companies with complete profiles because they look more transparent and professional.
Plus, a complete profile speeds up the verification process.
Step 3: Click “Post a Job”
Now the exciting part begins!
From the dashboard, select “Post a Job”.
This opens the job creation form where you’ll input all job-related details.
Step 4: Write a Clear, Attractive Job Title
Your job title is the first thing candidates see — so make it simple, clear, and searchable.
✔ GOOD examples:
- Front-End Developer (React)
- Customer Support Representative – Remote
- Digital Marketing Manager (Full-Time)
✘ Avoid:
- “We Are Hiring!”
- “Urgent Job – Apply Now”
- “Rockstar Designer Needed”
Clear titles attract higher-quality applicants.
Step 5: Fill In the Job Details Section
This is where you define the role. Fill it out carefully:
Fields include:
- Job category
- Location (On-site / Hybrid / Remote)
- Employment type (Full-time / Part-time / Contract)
- Salary range (recommended for higher engagement)
- Required experience
- Required skills
- Company benefits
🎁 Tip:
Mention perks like flexible hours, bonuses, or training programs — they attract more applicants!
Step 6: Write a Strong Job Description
This is the heart of your listing. A great job description helps you stand out.
Include:
- Role overview
- Daily responsibilities
- Technical and soft skills needed
- Company’s mission or culture
- Growth opportunities
🔥 Example intro:
“We are looking for a passionate Front-End Developer who loves clean code, modern UI frameworks, and building beautiful user experiences.”
This tone is friendly, professional, and modern — perfect for 2025 hiring.

Step 7: Add Screening Questions (Optional but Helpful)
JobsVerifier allows employers to add screening questions such as:
- “How many years of experience do you have?”
- “Have you worked remotely before?”
- “Attach your portfolio link.”
These questions help filter unqualified applicants early.
Step 8: Submit Your Job for Verification
Once your job listing looks great, click “Submit for Verification.”
What Happens Next?
JobsVerifier’s team + automated AI checks confirm:
✔ Company legitimacy
✔ Social media authenticity
✔ Website validity
✔ Employer identity
✔ No scam indicators
This process ensures that only genuine employers post jobs — which boosts platform trust.
Step 9: Job Approved → Go Live! 🚀
After approval, your job listing becomes live on the site.
You will receive:
- A confirmation email
- A link to your published job
- A “Verified Job” badge (if eligible)
- Access to your applicant dashboard
Your listing is now visible to thousands of job seekers!
Step 10: Manage Applications from Your Dashboard
In your dashboard, you can:
- View new applications
- Download CVs
- Shortlist candidates
- Mark applicants as reviewed
- Communicate with selected candidates
Everything stays organized and easy to manage.
💡 Pro Tips to Make Your Job Post Stand Out
⭐ 1. Always Add a Salary Range
Posts with salary ranges get 3× more applications.
⭐ 2. Add Strong Keywords
Helps your job appear in more searches.
⭐ 3. Use Clear Language
Avoid complicated jargon — keep it simple.
⭐ 4. Mention Remote / Hybrid if available
These roles attract more applicants.
⭐ 5. Update Your Company Profile Regularly
A credible company attracts credible talent.
🎉 Final Thoughts
Posting a job on JobsVerifier is not just easy — it’s powerful.
It allows employers to:
- Showcase authenticity
- Attract serious applicants
- Reduce spam and fake applications
- Build trust instantly
- Hire smarter and faster
In a world full of fake listings and scam recruiters, JobsVerifier stands out as a trusted hiring ecosystem where real employers connect with real talent.
Whether you’re hiring for the first time or posting your 100th role, JobsVerifier helps you build a transparent and reliable hiring experience for candidates.